The First Time Ever I Tuned My Axe
Getting your guitar in tune for the first time is often frought with uncertainty, even with a guitar tuner. Assuming that you have a tuner, follow this method and you will have the guitar in open tune in no time. If you don’t have a tuner, I strongly advise you to get one, preferably a chromatic tuner.
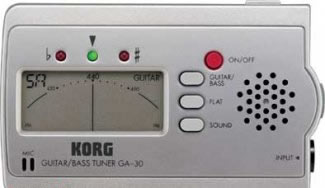
Korg GA-30 Guitar Tuner
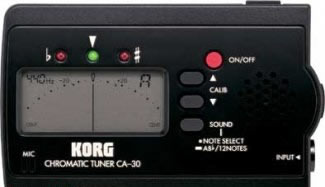
Korg CA-30 Chromatic Tuner
There are really 2 types of tuner on the market for the guitarist – the “guitar tuner” and the “chromatic tuner”. The difference between them only really becomes apparent when you try to change to a non-standard tuning (e.g. DADGAD). The guitar tuner is designed to pick up the six notes of a guitar in standard tuning (EADGBE) and works well doing this, but has difficulty in allowing an alternate tuning, because it doesn’t recognise anything other than EADGBE. Some, such as the Korg GA-30 allow you to modify the standard pitches by up to 5 semitones higher and lower, which does let you use alternate tunings. Much more comfortable to use, however, is the chromatic tuner, which will recognise any note and tell you how sharp or flat you are tuned – you can use any alternate tuning with no problem. What a tuner cannot do is to tell you which octave the note is in and here is the basis for much confusion – try to tune an octave too high and your strings will snap, an octave too low and they will flap around like a clothes line.
For this method of tuning, the tone generator, which will produce a continuous tone at 440Hz, is important. 440Hz is the international standard frequency of Concert A, which is found at the 5th fret of the high e string.
Why the rider “open tune” in the first paragraph? The reason for this is that whilst a guitar may be fine when the open strings are in tune, it may not be when fretted notes are played. This is due to the way that the frets are laid out – it’s to do with “equal temperament”, which I won’t go into here and relates to the intonation of the guitar.
Now that we’ve got the technology out of the way, let’s get down to tuning the guitar. What state the tuning is in is irrelevant – this method will bring your guitar into standard tuning and in the correct octave!
So, first things first – check you know how to operate the tuner! Not difficult, but it does save time when tuning, if you don’t have to keep flicking through the (albeit 2 page) instruction manual. Now connect your guitar to the tuner or, if you have an acoustic, bring it close so that the inbuilt microphone can pick up the sound from you guitar.
The first step is to get one string near to being in tune – not only the right pitch but in the right octave. So, switch on the Concert A tone. Fret the high e string (the thinnest one) at the 5th fret. Now tune the guitar to the generated tone – the first string at the 5th fret should sound (at least close to) the same note as Concert A. Once you have this, you can turn off the tone and the tuner, for the moment.
You now need to bring the other 5 strings close to being in tune, by following this method:
Tune the B string (second thinnest and second from bottom) at the 5th fret to the open high e string.
Tune the G string (third from the bottom) at the 4th fret to the open B string
Tune the D string (fourth from bottom) at the 5th fret to the open G string
Tune the A string ( next to thickest string) at the 5th fret to the open D string
Tune the low E string (thickest and topmost string) at the 5th fret to the open A string.
At this point, it is wise to understand the effects of a non-locking tremelo/vibrato/whammy bar. The mechanism is held in equalibrium by springs, how many depending upon the gauge of the strings. Springs being springs, they stretch with tension and strings being strings, they don’t (we’ll come back to this later). As you add tension to the string, by turning the tuner, you do two things – you add to the total tension on the springs, causing them to stretch slightly and reduce some of the tension on the other strings. So, when you tune one string up, you are automatically tuning the other strings down. You will have to take this into account when fine tuning. There are locking vibratos, like the Floyd-Rose, but tuning them is explained well on the Floyd-Rose website.
The guitar should only need fine tuning now, so set the tuner up again and we’ll start with the low E (or 6th string – the fattest). When played, it should register E on the tuner and you should only have the “in-tune” LED lit. If not, the tuner will tell you what is needed. In general, tuners show whether the string is tuned flat or sharp by red (and maybe also yellow) LEDs arrayed n the minus (flat) and plus (sharp) sides of “tune”. It may also have an “analogue” meter with “moving” arm. In addition, the chromatic tuner will give you the actual note which is nearest to the one played. Indications on the minus side mean that the string is tuned flat and needs to be tightened slightly. On the plus side, the string is too tight and needs to be slackened slightly. As you turn the tuning knob, you will see the result reflected on the display of the tuner – take things nice and easy, fine tuning can be turning the knob as little as1-2 degrees. Due to the way physics works, the strings will need to be plucked regularly to keep an sound strong enough for the tuner to pick up. If you have a hard-tail (no vibrato), you can tune the string accurately. If you have a floating bridge (i.e. non-locking vibrato), it is best to tune about 10 cents sharp (+10 on the dial or a couple of LEDs on the sharp side).
Now repeat this on each of the other strings. If you have a hard-tail, tune each string accurately. If you have a floating bridge, reduce the sharpness on the 5th and 4th strings down to +5 and zero sharpness on the thinnest 3 strings. You will now have to start with the low E again and tune, this time just a couple of cents sharp, same with the A and D strings – the thinnest 3 strings (G, B, high e) should be more or less correct. Repeat again, tuning each string accurately, until all are in correct tune. Sorry, but with floating bridges this step is just down to getting closer and closer with each cycle through the strings.
If the strings are new, you will find that they stretch over a period of about 12 hours and you will have to retune. There are methods people use to reduce this, but I find that if I change strings when I’m not going to be playing any more that day, they have fully stretched by the time I come to pick up the guitar again and I just need to retune the once.
Your guitar should now be in open tune. We can check the intonation quite easily – your tuner can recognise a note but not it’s octave, which is OK for this step, even with a “guitar tuner”. Assuming the string is properly tuned open, fretting the 12th fret should give you the same note albeit one octave higher. Check each string – if they all give exactly the same note as the open string, all is well. If they differ, the guitar will need to be intonated. Most electric guitars are quite easy to intonate. Acoustics, on the other hand, are not so easy. As a beginner, I would recommend taking the guitar (irrelevant of type) into a guitar tech and have him do it. Ask him if you can watch how he does it, so that, when you feel confident enough, you can do it yourself.
As you get more experienced, you will find that you can rough tune without needing to start off using the Concert A tone.
Tip: Make use of a change of strings to clean up your guitar, particularly the parts, which are difficult to reach with strings on (e.g. fretboard)
Happy Tuning.